

Key takeaways
- Lens shade: The darker setting reduces visible light reaching the eyes. Never choose a shade merely because it looks comfortable; use the recommended range for your process and current, then select the darkest setting that still allows a clear view of the weld.
- Response time: A specification such as 1/25,000 second describes the filter’s switching speed. It does not guarantee good performance if the sensors are covered, the battery is weak, or the arc is below the helmet’s sensitivity threshold.
- Viewing area: A larger window improves awareness of the joint and surrounding work. It also increases helmet size, weight, and replacement cover-lens cost.
- Optical quality: Look for a balanced optical classification, commonly expressed using EN 379 ratings such as 1/1/1/2. Fewer optical distortions make it easier to track a seam accurately.
- Battery life: Solar-assisted helmets may run for years under normal use, but their internal coin cells still age. Models with replaceable batteries are easier to keep in service than sealed designs.
Best Welding Helmets for Clear, Safe Work
The best welding helmets are the ones that match your welding process, required lens shade, viewing needs, and hours of wear: a compact shade-10 auto-darkening helmet suits occasional MIG work, while a professional helmet with a large viewing area, replaceable battery, and adjustable delay is a better choice for daily fabrication.
Quick comparison of leading helmet types
| Helmet type or example | Typical lens shades | Viewing area | Darkening response | Power and practical strengths | Typical market range |
|---|---|---|---|---|---|
| Basic fixed-shade passive helmet | Shade 10–14, depending on lens | Approx. 3.75 × 1.5 in | Instant because the lens is fixed | No batteries; rugged and inexpensive | $35–$100 |
| Entry-level auto-darkening helmet | Light shade 3; welding shade 9–13 | Approx. 3.7 × 1.6 in | About 1/25,000 second | Good for occasional MIG, flux-cored, and stick work | $70–$180 |
| Lincoln Electric VIKING 3350 class | Light shade 3; variable shade 5–13 | Approx. 3.74 × 1.38 in | Up to about 1/25,000 second | Large viewing area, solar-assisted power, replaceable cover lenses | $250–$450 |
| Miller Digital Elite class | Light shade 3; variable shade 5–13 | Approx. 3.74 × 1.38 in | Up to about 1/20,000 second | Multiple operating modes, adjustable sensitivity and delay | $250–$450 |
| 3M Speedglas 9100 class | Light shade 3; welding shades commonly 5–13 | Approx. 3.7 × 2.0 in, model dependent | Up to about 1/25,000 second | Strong fit adjustment, side-window options, professional accessories | $400–$800 |
| Premium panoramic auto-darkening helmet | Light shade 2.5–3; variable shade 5–13 | Often 4.0 × 2.0 in or larger | About 1/25,000 second | Excellent peripheral vision; higher replacement-part costs | $350–$900 |
Specifications vary by exact model and production version. Before buying, confirm the current lens range, certification marking, viewing dimensions, battery arrangement, and replacement-lens availability. Look for appropriate ANSI Z87.1 and/or EN 379 markings for the market in which you will use the helmet.
Our top picks

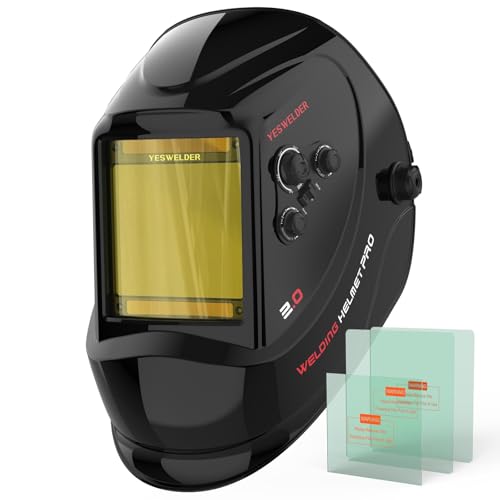


As an Amazon Associate we earn from qualifying purchases at no extra cost to you. Ratings are shown as listed on Amazon.
Choose by welding process first
MIG and flux-cored welding
MIG welding normally calls for a shade around 10–13, with the precise setting determined by amperage, wire type, and the applicable safety guidance. For short repairs, a standard auto-darkening helmet with a 3.7 × 1.6-inch viewing area is usually sufficient. For production work, a larger lens reduces the need to move your head while following a long bead.
Flux-cored welding produces more smoke, spatter, and slag than many clean MIG applications. Choose a helmet with a durable outer cover lens, a low-light arc sensor mode, and a grind mode that is physically or electronically difficult to activate accidentally. Grind mode does not provide welding protection, so verify the setting before striking an arc.
Stick welding
Stick welding can create a bright, intermittent arc and often involves awkward outdoor or repair positions. A helmet with two or more arc sensors, adjustable sensitivity, and a reliable low-light response is preferable. Variable shades from 9–13 cover many common stick applications, but the correct shade still depends on amperage and electrode size.
A fixed-shade passive helmet remains a valid choice for experienced stick welders who work at one amperage. It has no battery to fail and no liquid-crystal switching delay. The tradeoff is that the dark lens makes electrode positioning and restarting more difficult before the arc is established.
TIG welding
TIG work places the greatest demand on helmet sensitivity. Low-amperage TIG arcs can be too faint for a poorly adjusted auto-darkening filter, particularly when using a torch-start or small stainless-steel joint. Select a helmet with a dedicated TIG or low-amperage sensitivity setting and at least two functioning sensors.
A variable range beginning around shade 5 is useful for TIG because lower-current work may require less darkness than high-current aluminum. For long TIG sessions, optical clarity, color recognition, and a stable headband matter more than a tiny difference in switching speed. A 1/25,000-second response is already extremely fast; fit, sensor reliability, and lens quality usually have greater practical importance.
Plasma cutting and grinding
Plasma-cutting shades vary with current, and many helmets use a separate cutting range from approximately shade 5 to 8. A model that supports both cutting and welding modes is more versatile than one designed only for welding. Confirm that the helmet’s cutting range matches your cutter’s current before relying on it.
For grinding, use a helmet with a clearly marked grind mode only when the manufacturer states that the mode is suitable for grinding. The helmet must still be paired with appropriate eye, face, hearing, respiratory, and clothing protection for the task. A welding helmet is not a substitute for a properly rated face shield when the hazard requires one.
What the numbers mean in daily use
- Lens shade: The darker setting reduces visible light reaching the eyes. Never choose a shade merely because it looks comfortable; use the recommended range for your process and current, then select the darkest setting that still allows a clear view of the weld.
- Response time: A specification such as 1/25,000 second describes the filter’s switching speed. It does not guarantee good performance if the sensors are covered, the battery is weak, or the arc is below the helmet’s sensitivity threshold.
- Viewing area: A larger window improves awareness of the joint and surrounding work. It also increases helmet size, weight, and replacement cover-lens cost.
- Optical quality: Look for a balanced optical classification, commonly expressed using EN 379 ratings such as 1/1/1/2. Fewer optical distortions make it easier to track a seam accurately.
- Battery life: Solar-assisted helmets may run for years under normal use, but their internal coin cells still age. Models with replaceable batteries are easier to keep in service than sealed designs.
Best choice by situation
| Your situation | Most suitable choice | Why |
|---|---|---|
| Occasional home repairs | Entry-level auto-darkening helmet | Variable shade, modest cost, and enough adjustment for MIG or stick work |
| Learning TIG | Mid-range helmet with TIG sensitivity | Low-amperage arc detection is more important than extreme viewing size |
| Daily fabrication | Professional large-window helmet | Better comfort, replaceable parts, multiple sensors, and durable controls |
| Outdoor or variable lighting | Helmet with adjustable sensitivity and two or more sensors | Helps prevent missed arcs and unwanted switching from changing light |
| Frequent overhead welding | Lightweight, well-balanced helmet | Lower leverage on the neck and less fatigue during repeated repositioning |
| Very tight joints or large assemblies | Large or panoramic viewing area | Improves peripheral awareness without repeatedly lifting the helmet |
Comfort is a safety feature
A helmet that slides forward, pinches the forehead, or strains the neck is likely to be lifted or worn incorrectly. Look for a ratchet headband with several adjustment points, a replaceable sweatband, a firm locking mechanism, and a shell that balances near the center of the head rather than pulling forward.
Weight alone is not the whole story. A 1.5-pound helmet can feel better than a 1.2-pound helmet if its lens and battery are positioned more effectively. Try the helmet with your usual respirator, safety glasses, ear protection, and welding cap. These accessories can change the fit and may interfere with the rear adjustment knob.
Ownership costs and maintenance
The outer cover lens is usually the first consumable to wear out. Spatter, grinding dust, and scratches reduce visibility even when the auto-darkening filter still works. Replacing a cover lens early is cheaper than continuing to weld through a distorted view. Keep inner and outer lenses matched to the manufacturer’s specifications; an improvised plastic insert can interfere with optical performance or fit.
Use a soft, clean cloth and lens-safe cleaner. Do not scrape spatter from the filter with a blade, soak the electronics, or use abrasive shop towels. Store the helmet away from direct sunlight, excessive heat, and welding fumes. Check the sensors for dust before each session and inspect the headgear for cracked pivots, loose screws, or a stretched sweatband.
As a simple ownership calculation, a $300 helmet used 150 times per year for three years costs about $0.67 per use before replacement lenses and batteries. If a $100 helmet needs replacement after one year of heavy work, the cheaper purchase may not be cheaper over the same period. For occasional users, however, the lower initial price can be sensible if the helmet has the required shade range and certification.
Final buying recommendation
For most users, the best welding helmets are mid-range auto-darkening models offering shades 5–13, a response time near 1/25,000 second, at least two sensors, adjustable sensitivity and delay, a viewing area near 3.7 × 1.6 inches or larger, and replaceable cover lenses and batteries. Choose a premium panoramic helmet when peripheral vision and long-session comfort justify the cost. Choose a passive helmet when maximum simplicity, one fixed process, and zero battery dependence matter most. Whatever the style, match the lens shade to the welding current, inspect the filter before use, and replace damaged lenses promptly.



Write Your Review
No reviews yet. Be the first to share your experience!